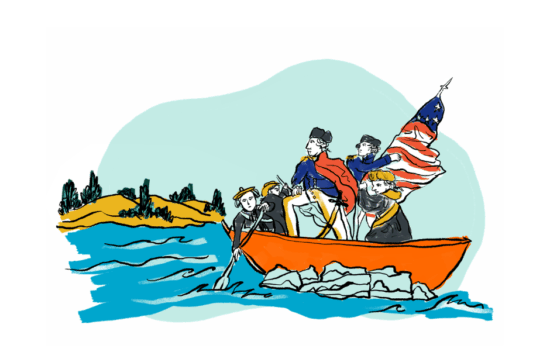
Course of the American Revolution
Lesson Components
Powerpoint: Course of the American RevolutionElementary Lessons | Course of the American Revolution VideoMaterials for Scavenger Hunt Stations | ElementaryScavenger Hunt Stations Handout | ElementaryIt’s About Time Game | ElementaryAmerican Revolution Readings | ElementaryRevolutionary Americans Research HandoutLesson Plan PDF
Essential Question:
How did Americans show courage in their fight for liberty during the American Revolution?
Guiding Questions:
- How were colonists courageous in the battles of the American Revolution?
- How did the American Revolution impact Americans?
- How do we remember the American Revolution today?
Learning Objectives
- I can define and use the words liberty and courage.
- I can create a map of American Revolution battles.
- I can use online and/or print sources to conduct research on important people.
- I can create a timeline of the life of an American from the American Revolution.
- I can create a product to showcase my learning and understanding of the American Revolution.
Content Objectives
- I can locate significant events of the American Revolution on a map.
- I can identify major events and battles of the American Revolution.
- I can explain the impact of major events and battles of the American Revolution
- I can identify important individuals and describe their views of the Revolution.
- I can identify examples of how individuals participated in the Revolution and explain the contributions of different people throughout the Revolution.
Teacher Materials
- Vocabulary Cards
- Teacher Prep Resources
- Lesson Slide Deck
- Timeline Game Video Explainer
- Battles of the American Revolution Map
- Battle of Yorktown Map
- Ride of Paul Revere Map
- It’s About Time Game
- Lesson Rubrics
- Lesson Video
Student Handouts
- Handout A: Vocabulary Word Study
- Handout B: Scavenger Hunt Stations Student Handout
- Handout Set C: American Revolution Battles Scavenger Hunt Stations
- Handout D: Revolutionary Americans Research
- Handout E: Performance Assessment Handout
- Handout F: Lesson Reading
- Virtual Field Trip
- Bingo Board
- Handout G: Student Self-assessment
This lesson is designed around inquiry questions. There is one essential question, and several guiding questions around which the content is based. The lesson takes place in 5 stages:
- Anticipate- Students build background knowledge needed to be successful in the lesson.
- Engage- Students are ‘hooked” into the lesson.
- Explore- Students grapple with the main content of the unit (usually 2-3 parts).
- Assess- Students demonstrate their knowledge through a performance assessment.
- Reflect- Students reflect on their learning in the lesson.
- The sections below provide a brief overview of the unit’s structure. It offers a snapshot of the organization and flow of the entire unit.
The following detailed sections break down the five stages of the lesson. Each stage is discussed thoroughly with actionable steps to guide you through the teaching process effectively.
Anticipate
Vocabulary Word Study
To anticipate the lesson, students conduct a word study to understand the civic virtue focus of the lesson, courage, and the principle focus of the lesson, liberty. This knowledge will enable students to build on this common language throughout the lesson.
- Glossary term(s): term(s) that can be used during this part of the lesson for pre-teach opportunities:
- Courage
- Liberty
To begin, provide each student with two copies of Handout A: Vocabulary Word Study, pencils, coloring utensils, and dictionaries or devices for research. Then, give students adequate time to complete the assignment, approximately 5-10 minutes, or assign it for homework.
When time has elapsed or students have completed Handout A, review with students by asking 1-3 students to share their writing for each section of the organizer.
Optional: When students complete the organizer, review the definitions and illustrations from the Vocabulary Cards
Finally, lead a whole group discussion inviting students to answer the discussion questions aloud.
- How is courage different from liberty?
- How are courage and liberty related?
- What liberties do you have now that you did not have when you were younger?
- In what ways are you more courageous than you were when you were younger?
Before moving on to the next part of the lesson, tell students: “We will be thinking a lot about courage and liberty in this lesson. At the end of the lesson, you will create a timeline or map and you will be asked to call out where you see liberty and courage. Be sure to keep these ideas in mind as we move through the lesson and ask any questions you have along the way.”
Teacher note: Courage can seem an intimidating thing, but students do it in their lives more often than they realize. Asking someone to stop picking on someone else is a big one, but they can also be small. Sitting next to a new student or asking someone if they are feeling okay, trying out for a new team/club. Liberty is experienced by students as well. They grow into more liberties as they get older like walking the halls alone, choosing their own clothes, and driving one day. Most virtuous and principled actions happen in the mix of our daily lives.
Optional: If students have already completed the Virtue Vocabulary for these words in another unit or need an extension activity, here are some other vocabulary work options:
- Word Game – Students create a game to use their virtue vocabulary including instructions and materials. Then students play each other’s games.
- Word Search – look for the virtue vocabulary in books. Write down the title of the book, page number, and sentence where you found the word.
- Vocabulary Quiz – Create a vocabulary quiz for your classmates using multiple choice, true and false, or matching questions. Include at least 5 questions and an answer key.
- Vocabulary Story – Write a story using the virtue vocabulary words, then read the story aloud to students in a younger grade. See if the younger student understands the virtue vocabulary after hearing your story.
Engage
To engage the students in the lesson, play a round of the game It’s About Time!
Through the game, students will review the concept of timelines, develop skills they will need for the summative assessment, and use their historical thinking skills.
- Glossary term(s): term(s) that can be used during this part of the lesson for pre-teach opportunities:
- Order
- Sequence
- Circa or ca.
It’s About Time! Game
To begin, quickly overview the parts of a timeline. Tell students timelines are like maps that represent time, rather than a place. Be sure to mention that timelines move from left to right, the numbers represent years and move from one on the left to the present year on the right. The arrows on each end show that time extends in each direction.
Then tell students: “Today we will play a new game called It’s About Time! In this game, you will place events from U.S. history in order with your group. You may know these events, but you may not. It is ok if you do not know them. You might just learn something while you are trying your best. Let’s go over the rules before we play.”
View a video explainer of how to play here.
It’s About Time! Game Rules:
- Each player gets 3-5 cards.
- Use the remaining cards to create a draw deck.
- Players leave the cards face up on the table in front of them during the game; they do not pick them up. It is okay for other players to see the cards.
- To complete the set up, take one card from the draw deck and place it face up in the middle of the play area.
- The player whose birthday is next will start the game.
- To begin the game, the first player lays a card where they believe it goes next to the existing card to create a timeline from left to right in the direction of the card in the play area.
- The player turns the card over to reveal the date.
- If the card is correctly placed on the timeline, as indicated by the dates being in order, they leave it. If it is in the incorrect place, they move it to the correct place on the timeline and draw a card.
- Then the play passes to the next person to take their turn with the same steps: place a card and reveal the date. Then, correct the timeline and draw if necessary.
- The first player to place all their cards wins the game.
- If there is a tie, the players who played their last cards in the same round each draw one card and continue playing until only one player places their card correctly in a round.
The game is most effective when playing in small groups of 3-5 students as closely matched in knowledge as possible.
Scaffolding note: For students who need more support or brand-new players, it can help to play on a surface with a line drawn on it with an indication of where the year 1 is and where the current year is.
This game can be laminated and re-played repeatedly with any unit. It may even become a favorite indoor playtime or early finisher game! There are extra cards provided to allow you to make this game your own with state or local history dates as well.
Explore
In the explore section of the lesson, students will consider the events of the American Revolution with a particular emphasis on the stories of individual’s courage and fight for liberty. The explore section is broken into 3 sections. The formative assessment in each section builds skills students will need for the final performance assessment.
Explore Part #1: How were colonists courageous in the battles of the American Revolution? (45-60 minutes)
In the first explore activity, students learn about 3 major battles of the American Revolution through the stories of the battles in timed scavenger hunt stations. Students investigate instances of courage and the role of liberty in shaping the revolution. Then students will use what they have learned to create a map of the battles.
- Glossary term(s): term(s) that can be used during this part of the lesson for pre-teach opportunities:
- Revolution
- Militia
- Patriot
- Colonist
- Fort
- Siege
- Retreat
- Surrender
Major Battles Scavenger Hunt
Prepare: Use your classroom furniture to create 4 student workstations. Each station will need copies of Handout Set C: American Revolution Battles Scavenger Hunt Stations for each student at the station. Students will need an Handout B organizer and writing utensil (or online access and device). Students will move around the room to each station for this activity in timed stations.
Before class, place Handout Set C at the 4 student workstations you have created. As students enter the room, post a list of materials they will need and ask them to collect or distribute materials for class to begin.
Work with students to review Handout B: Scavenger Hunt Stations Student Handout for the activity. Explain each box and detail your expectations for students both in terms of work quality and behavior during the activity.
Set a timer for 10 minutes and set students to reading and taking notes to complete their scavenger hunt for the station they are at. When time has expired, move students to the next station for 10 minutes, even if they are not finished. Repeat until all 4 stations are complete and students have finished all 4 sections of their scavenger hunt worksheet.
Scaffolding note: Depending on your student population, students may benefit from working together on the scavenger hunt in each station. Jobs can be assigned to each student according to their strengths (group leader, scribe, timekeeper, reader, encourager, etc.).
When students have completed the activity or time has expired, bring students back to their seats for a debrief and class discussion.
Class Discussion Prompts:
- Which parts of the scavenger hunt were toughest for you/your group? What did you not finish?
- Let’s fill those in now and check our answers.
- Liberty is the power to think and act as one sees fit without restraint except by the laws of nature and interfering with someone else’s rights. How were the American Colonists fighting for Liberty, both their own and the liberty of others? How might others see the American Revolution differently?
- Courage is the ability to take constructive [useful] action in the face of fear or danger. Which of the Americans from the battles would you consider Courageous? Why?
- How can we remember these battles?
- Lead the class in brainstorming ways to create a mnemonic device to remember the battle names.
- For example: “Loud Cars Run Parade Routes BeHind You” for the words: Lexington and Concord, Ride of Paul Revere, Bunker Hill, Yorktown
Formative Assessment: Creating Maps
In this formative assessment, students will create a map to reflect their learning in the stations and build map skills that they will draw on in the summative assessment.
To begin, ask students to go back to their scavenger hunt Handout B and highlight, circle, or underline where each battle happened. Then, distribute map creation materials.
The teacher slide deck contains slides that will help you review the following topics:
- How to research and create a map
- The slide deck prompts students to start with an outline, adding locations, and adding details like a title, labels, a map key, descriptions, and color. With teacher modeling, the slide deck can prepare students to create a quality map of their own.
- Rubric
- The slide deck contains a copy of the rubric to help show students what exactly their map needs to contain.
Tell students to use everything that they have learned from the scavenger hunt stations, and what they research on their own to create a detailed map of America showing the location and short description of:
- The battle of Lexington and Concord
- The battle of Bunker Hill
- The battle of Yorktown
Scaffolding note: If your students need more support to draw their map, you can use the following prompts to guide students as they draw.
- Draw the outline.
- Use the reference map you researched to create the points for the battles.
- Use Handout B to write a description of each battle. Make sure one talks about courage or liberty.
- Create the title, key, and label the locations on your map.
- Color your map.
Formative Assessment 1-point Rubric:
|
Evidence of Mastery |
Expectations |
Room for Growth |
| Product is clearly a map | ||
| Neat, colorful, and complete (all 3 locations) | ||
| A 2-3 sentence description for each battle | ||
| Information is well-researched and factual | ||
| Map includes a title, key, and labels | ||
| Map has 1 location that showcases Courage or Liberty |
This 1-point rubric is for quick student feedback. It allows the teacher to identify strengths and weaknesses for every student rather than assigning a score. The rubric can be modified to create an analytic rubric if scoring is needed. Be sure to give students feedback on their formative assessment quickly so they can reflect on their knowledge and performance as you move to the next part of the lesson.
Explore Part #2: How did the American Revolution impact ordinary Americans? (45-60 minutes)
In the second explore activity of this unit, students will research an American from the Revolutionary Period. Then, students will discuss questions together in groups to determine how diverse groups were impacted by the war.
- Glossary term(s): term(s) that can be used during this part of the lesson for pre-teach opportunities:
- Revolutionary
- Revolution
- Retreat
- Strategy
- Diplomatic
- Allies
- Surrender
Revolutionary American Research
Students research an American using Handout D: Revolutionary Americans Research. Options: Crispus Attucks, Mercy Otis Warren, Joseph Brant, John Adams, or George Washington. These historical figures will serve as avatars for groups of people affected by the war: Native Americans, African Americans, women, politicians and military officers.
Teacher note: The American revolution was experienced differently by individuals throughout North America. Discuss with students how the stories of the individuals they are researching give us windows into different experiences but be wary of conflating the experience of the individual with the experience of an entire group.
Assign students an American to research randomly or allow them to choose. Then, arrange students into groups to carry out their research together. Alternatively, students can be given independent work time, then come together as a group.
Teacher note: This activity can be modified to fit the needs of your classroom. If students have devices for research like laptops or tablets, those can be used. If you want your students to practice researching from printed text, choose books available from your library or print articles appropriate for them. You can also modify the people within the identified group if needed. For example, substitute Martha Washington or Abigail Adams for Mercy Otis Warren if your library does not have books on Warren.
When students have finished their research or approximately 20 minutes has expired, move students to desks or a rug so that the class can discuss their findings. Arrange students by research subject so that students who researched the same American are close together.
Discussion Questions:
- Ask a student from each research group to summarize the American they read about.
- Do you think any of the Americans you researched were involved in the battles we studied in Explore #1? Why or why not?
- The battles were Lexington and Concord, Bunker Hill, and Yorktown.
- All Americans were affected differently by the revolution. Discuss each figure’s individual experiences.
- Crispus Attucks was a free African American.
- Joseph Brant was a Native American.
- Mercy Otis Warren was a woman.
- John Adams was a political leader.
- George Washington was a military officer.
- How were these people affected by the revolution in similar ways? How were they affected differently? What might have influenced this?
- How were these people required to have courage in their fight for liberty?
- How did these people show courage in different ways? Give examples.
- Mercy Otis Warren used her talents to write.
- Joseph Brant led his people against the Americans.
- Crispus Attucks joined the resistance against British rule.
- John Adams led the group that wrote the Declaration of Independence.
- George Washington led troops into battle and trained them.
Scaffolding note: Students will draw on this information in the formative assessment. If your students need more support or there will be time between those activities, it can help to write down the answers to these questions in a place students can reference and come back to later.
Next, fill any lingering student knowledge gaps with Handout F: Lesson Reading and/or watching the lesson video. They explain more about how Americans were impacted by the Revolution. For ideas on how to engage your students in reading check out our Modes of Reading teacher support document.
Formative Assessment: Creating a Biography Timeline
Ask students to locate their completed Handout D, lesson reading, and any other materials they used during their research. They may find useful information and dates on these pages for their timeline.
Use the Teacher Slide Deck to quickly teach students the steps for creating a timeline.
- Quick timeline creation how-to
- The slide deck leads students through selecting important dates, organizing them on a line, adding a title, labeling, describing the dates, adding illustrations, and adding color.
Teacher Note: Use this opportunity to compare maps and timelines. Explain how timelines are like maps of time, and maps show physical locations. You might also want to review the grading rubric with students at this stage.
Tell students to use everything that they have learned from the research activity, and lesson reading to research on their own for the purpose of creating a simple timeline of an American Revolution historical figure. Students should focus their timeline on when their chosen person showed courage and/ or fought for liberty. They can use any ideas from the discussion questions in Explore #2 to inform their answers.
Provide materials for students to create freeform timelines with paper, coloring utensils, glue and scissors. Or select an online platform for students to create a digital timeline.
1-point Rubric:
|
Evidence of Mastery |
Expectations |
Room for Growth |
| Product is clearly a timeline | ||
| Neat, colorful, and complete (has 3 points of time) | ||
| A 2-3 sentence description is with each point of time | ||
| Information is well-researched and factual | ||
| Timeline includes a title, dates, and labels | ||
| Timeline has 1 location that showcases Courage or Liberty |
This 1-point rubric is for quick student feedback. It allows the teacher to identify strengths and weaknesses for every student rather than assigning a score. The rubric can be modified to create an analytic rubric if scoring is needed. Be sure to give students feedback on their formative assessment quickly so they can reflect on their knowledge and performance as you move to the next part of the lesson.
Assess
In the final activity of this lesson, students use all that they have learned and the skills they have practiced to create a product of their choosing: a map or timeline. The map or timeline will explain the life of an important American or a Revolutionary battle.
Student Created Timeline or Map
To begin, distribute Handout E: Performance Assessment Handout. This assignment sheet for the project helps students plan their map or timeline. For students who need more support, lead the class through their selections one step at a time.
The slide deck includes slides to help you review and assign the following topics:
- Choosing a topic
- Completing Handout E
- Handout E leads students through planning their timeline or map.
- Rubric
- The rubric shows students exactly how their work will be evaluated and gives insight into the pieces that must be included in their product.
Topic List:
- Battle of Lexington and Concord
- Battle of Bunker Hill
- Battle of Yorktown
- Ride of Paul Revere
- Life of Paul Revere
- Life of Crispus Attucks
- Life of Mercy Otis Warren
- Life of Joseph Brant
- Life of John Adams
- Life of George Washington
|
Evidence of Mastery |
Expectations |
Room for Growth |
| Product is clearly a map or timeline | ||
| Neat, colorful, and complete ( dates or locations) | ||
| Information is well-researched and factual in descriptions of events | ||
| Map or Timeline includes a title, key, and labels | ||
| Map or Timeline has 3 dates or locations that showcase and describe courage or liberty | ||
Scaffolding note: The number of locations/dates in the rubric has been left open for teacher modification. 3-5 for younger students and 5-10 for older students are suggested. We have also added some blank spaces for teachers to add their own criteria.
Reflect
In the final activity of the lesson, students complete a self-assessment to reflect on their growth and learning during the lesson. Then, students engage in a visual and interactive exercise by contributing to creating an American flag display.
Student Self-Assessment
- Hand out Handout G: Student Self-Assessment to each student. This handout helps students reflect on what they’ve learned, guided by the lesson’s objectives and the primary essential question.
- Explain the scale students should use for assessing themselves. Options can include stars, numerical scales, written responses, or sketches. Choose the method that best suits your classroom’s needs.
- Allow students to complete the self-assessment individually. You may provide prompts to help them think deeply. Ensure each student has enough time and space for genuine self-reflection.
- Scaffolding Note: For students new to self-reflection, consider using a think-aloud approach:
- Identify challenging sections of the handout in advance. During the handout review, pause at these challenging sections. Model reflective thinking by defining tough vocabulary, discussing complex sentences, and explaining thought processes.
American Flag Reflection Activity
- Before class, draw a large outline of an American flag on a bulletin board or large piece of poster paper. Leave spaces for stars blank.
- Provide markers, paper star cutouts, and red, white, and blue paper or other craft supplies.
- Writing Reflections:
- Give each student a paper star cutout and a marker.
- Prompt them to write a reflection on the lesson learned from the question: “How did individuals show courage during the major battles of the Revolution?”
- After writing, students should attach their stars to the designated area on the flag.
- Discussion and Further Reflection:
- Initiate a discussion with the question: “How were Americans inspired by the idea of Liberty?”
- Follow up with a personal reflection question: “How are you inspired by the idea of Liberty?” Have students write their responses on the red and white stripes of the flag.
- Plan to revisit the ideas written on the flag in future class discussions. This will help reinforce the lessons learned and strengthen community and shared values in the classroom.
Teachers Note: To extend students learning, visit the Smithsonian’s website to learn more of the history of the American flag: https://www.si.edu/spotlight/flag-day/flag-facts
Student Handouts
Next Lesson